
Create and Instantiate a Network Service
The Launchpad provides a detailed view of the underlying compute and network topologies. The process of making a network service available includes these steps:
- Create a network service, by browsing the NSD catalog and picking the relevant one.
- Instantiate the network service.
Note: If you onboarded a preconfigured network service descriptor through the Launchpad catalog, you do not need to configure connectivity. Connection points were predefined in the NSD package that you onboarded.
If you manually configured the NSD, follow the steps in Manually Create a Virtual Link Descriptor before you proceed.
- On the Launchpad menu, select Catalog > NSD LIST.
The NSD CATALOG page opens.
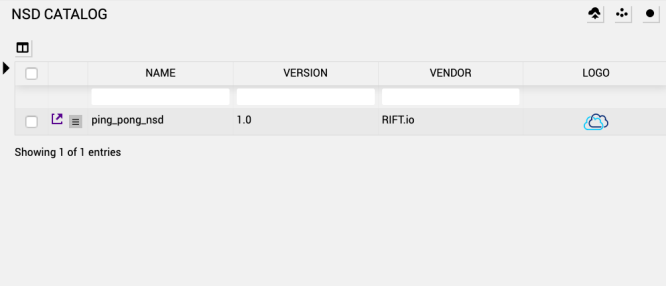
Note: On this screen, you can filter for NSDs by NAME, VERSION or VENDOR. If you want to open multiple or specific NSDs, then you can click the white checkbox button to the right of the arrow.
- Select a network service descriptor from the catalog and click the
 arrow to the left of the descriptor to edit parameters for the NSD.
 -

- Click Update.
- Next, click the CREATE SERVICE icon.
The CREATE SERVICE pop up appears. Provide an Instance name for the network service. Underscores are supported by spaces and special characters are not supported.
- Click CREATE service and the details page opens.
This step consists of configuring the newly-created NS instance with the required input parameters in a form.
Note: If you are instantiating the preconfigured Ping-Pong network service, you do not need to configure anything else. Expert users may want to modify the onboarded descriptor.
It is possible to exit the form and come back later. If you skip a step that does not include required fields, then Launchpad uses the default data. If you try to navigate away from the instantiation page, then a prompt appears asking if you want to save data prior to leaving the page.

Note: The above prompt appears if pop-ups for the site are enabled.
- On the Launchpad menu, click SERVICES.
-
Click
 next to the NS in the Service page for an NS that has not been instantiated and the current configuration of the service appears.
This page also includes the
 button to start the instantiation process for a service or a delete a service.
A Service Instantiation screen appears. Fill in the appropriate details for the specific service. The right side of the screen displays what can be changed using this edit option.
Note: You cannot navigate forward without filling in required fields (*). The Next >> button will not function if the previous required field isn’t populated.
Note: The Save button allows you to save your NSR config content and edit it later if you are not ready to Instantiate.
-
Provide the following details in the Service Instantiation step:

-
*Name - Name of the service
-
Description - Details about this service
-
Map Existing Resources - Service elements will be mapped to existing resources (True or False)
Note: If you want to add existing resources into a running NS, then choose True. See Map Service Elements to Existing Resources for steps to add or remove existing service elements to existing resources.
The NS instantiation process is customized for the NSD from which the service was created. Therefore, if the NSD has xpath Variables or Instantiation Variables, then the process is slightly different. You can refer to the steps for these processes. The remaining steps in this section are specific to the ping_pong_nsd.

-
-
Click Next>> to provide the following details in the Service Params step:

-
NSD Vendor - nsr
-
-
Click Next>> to provide the following details in the Control step:
Note: This step can appear earlier in the process if there are no instantiation-variable or input-parameter-xpath entries.

-
Auto Rollback - Enable auto-rollback when NS instantiation or scale-out fails
-
Config Timeout - NSR configuration timeout in seconds
-
*Resource Name - Orchestrator to use for allocation/managing service resources. This option only appears if you have more than one RO defined in your service.
-
*Datacenter - Default datacenter form which to appropriate service resources. This option only appears if you have more than one datacenter defined in your service.
-
-
Click Next>> to provide the following details in the Placement step. In this specific workflow, this option appears because the NSD has placement groups defined.

-
Server Group Name Orcus - The Affinity/Anti-Affinity Server Group
-
Server Group Name Quaoar - The Affinity/Anti-Affinity Server Group
-
-
Click Next>> to provide the following details in the InterVNFLink-1 step to map an ip profile from the NSD.
In this specific workflow, there are two profiles defined (InterVNFLink-1 and InterVNFLink-2). The name of the step in the UI matches that of the ip profile. An ip profile can define a list of subnet definitions which can be configured in this section. Each subnet definition has a name that appears on the right side of the UI. In this InterVNFLink profile, one subnet is defined, and it is named subnet-1. The input fields do not change.

subnet subnet-1
-
IP Version - Select the IP version. The options include:
-
unknown
-
ipv4
-
ipv6
-
-
DNS Server - DNS Servers associated with IP Profile
-
Subnet Address - Subnet IP prefix associated with IP Profile
-
Subnet Prefix Pool - VIM specific reference to pre-created subnet prefix
-
Gateway Address - IP Address of the default gateway associated with IP Profile
-
Security Group - Name of the security group

dhcp-params
-
Enabled - This flag indicates if DHCP is enabled or not (True or False)
-
Start Address - Start IP address of the IP-Address rang associate with DHCP domain
-
Count - Size of the DHCP pool associated with DHCP domain
-
-
Click Next>> to provide the following details in the InterVNFLink-2 step to map an ip profile from the NSD:
subnet subnet-1
-
IP Version - Select the IP version. The options include:
-
unknown
-
ipv4
-
ipv6
-
-
Subnet Address - Subnet IP prefix associated with IP Profile
-
Subnet Prefix Pool - VIM specific reference to pre-created subnet prefix
-
Gateway Address - IP Address of the default gateway associated with IP Profile
-
Security Group - Name of the security group
-
DNS Server - DNS Servers associated with IP Profile
dhcp-params
-
Enabled - This flag indicates if DHCP is enabled or not (True or False)
-
Start Address - Start IP address of the IP-Address rang associate with DHCP domain
-
Count - Size of the DHCP pool associated with DHCP domain
-
-
Click Next>> to provide the following details in the VLDs step for all the VLDs that are defined in the NSD.
Note: DZS Cloud Orchestration orchestration supports multiple IP addresses assigned to a single port. OpenStack also supports allocation of multiple IPs to the same port. The IP addresses can be IPv4, IPv6 or a combination of the two and there can be multiple subnets created for the same network.
In this specific workflow, the NSD defines two VLDs mgmt_vld and ping_pong_vld1. The specific vlds for this NSD fully describe NSD VLD Init Params, VIM Network Name, VIM-network-profile and Ipv4 Nat Pool Name. This NSD has some default information so the UI preselected the InitParam option vim-network for mgmt_vld and vim-network-profile for ping_pong_vld1.


mgmt_vld
-
NSD VLD Init Params - Select type of initialization parameters for VLD instantiation. The options include:
-
Vim-network
-
Vim-network-profile
-
-
Vim Network Name - Name of network in VIM account. This is used to individuate pre-provisioned network name in cloud account.
-
Ipv4 Nat Pool Name - IPV4 nat pool name
ping_pong_vld1
-
NSD VLD Init Params - Select type of initialization parameters for VLD instantiation. The options include:
-
Vim-network
-
Vim-network-profile
-
-
IP Profile - IP Profile to use for VL instantiation. The options include:
-
InterVNFLink-1
-
InterVNFlink-2
-
-
IPv4 Nat Pool Name - IPv4 pool name
-
-
Click Next>> to provide the details in the Datacenter step to select the datacenter on which to place the VNF and to configure the placement groups.
This step is repeated for each CNFD or VNFD in the NSD and the content can change depending on how you have configured your datacenter. In this specific workflow, the CNFD or VNFD has a placement group named Eris defined and there are a few fields that can be configured for the placement group.
Note: If your CNFD or VNFD has no placement groups defined and no datacenter to pick, then this step does not appear.
-
Server Group Name Eris - The Affinity/Anti-Affinity Server Group
-
Datacenter - Select the Datacenter to use when instantiating the VNF.
-
-
Click Next>> to provide the details in the ssh keys step:

-
Ssh Keys - Use the drop-down menu to select all the keys you want copied to the create VMs of this service.
Note: If you do not have ssh keys to find, then this step is not present in the UI.
-
-
Click Next>> to provide the following details in the Users step. This information defines user accounts that will be created on all the VMs created for a specific service.

-
Name - Name of the user account. After you type a name into this field, additional fields become available.
-
User Info - Additional user information.
-
SSH Keys - Associated user keys.
-
-
Carefully check your entries. Click INSTANTIATE to start the instantiation of the service or click SAVE if you are not ready to instantiate. Return to the Service Instantiation process at later date to continue with the configuration.
Instantiating a Service with xpath Variables
If you set up NSD xpath variables in the input-parameter-xpath list property when you create a service, then you’ll see different options while instantiating the service. In this workflow, the following sections appear in the service parameters step:
-
start
-
control
-
service parameters
-
ssh keys
If you are configuring a service with xpaths, then there is a separate Service Parameters step. In this step, you can provide values for all the input-parameter-xpath entries defined in the NSD. The values for this step are dependent on what is defined in your NSD.
Instantiating a Service with instantiation Variables
If there are instantiation variables defined in the NSD from which this service was created, then you’ll see different options while instantiating the service. In this workflow, the Variables step appears. Please see the Variables step in the Instantiating a Service with xpath Variables Section.
Note: Instantiation variables come before the control variables because they can impact what information you are able to provide in the control section. Also, if your NSD has instantiation variables defined, then the second step is variables which hare used in the input-parameter-xpath. If all the input-parameter-xpaths are configured with a variable, then there will not be a service parameters step. However, if not all of them are configured with a variable, then the step will appear to provide values for those without variables.
The following list outlines the parameters that expert users can configure. Refer to the MANO Descriptor Reference for full details.
After carefully checking the parameters in the NSD, click Instantiate.
It may take several minutes for the service to come up. Status messages display on the Launchpad interface during the bring-up process. You can also open the Event Viewer or expand the Event Center for notifications and details about each event.
The Network Service Details screen displays the beginning of the instantiation process.

The first step is vl-init. The networks are orchestrated in this step. Once the networks are created successfully, a green checkmark appears to the left of  vl-init.
The second step is vnf-init. The VNFs are orchestrated in this step and image displays the successful completion of Network Orchestration. Under VNFS, there are links for each specific VNF that display additional details once this stage starts or is completed. Once the VNFs are created successfully, a green checkmark appears to the left of vnf-init.
The third step is the configuration. The step identifies the Day1 configuration which occurs after successful orchestration. When the network service is completed successfully, a green checkmark appears to the left of configuration.

The last step is ACTIVE. When the network service is ready, a green checkmark appears to the left of ACTIVE.
When the service is running successfully, the STATUS column displays Running - configured.
If a process fails, then error messages will appear in the Network Service Details screen explaining the reason for the failure. For example, in the screen shot below the Virtual-network allocate operation failed for cloud account: es2 Vim Network with name test_network does not pre-exist.

If the configuration fails, then the Network Service Details screen states Configuration failed.

If the instantiation fails, click  in the header and the Take Action dialog box appears.

Choose retry to attempt instantiation again or choose rollback to rollback the operation. Click EXECUTE. If you attempt to rollback the operation, then all the elements that were allocated during the failed instance are released. This is similar to terminating the NS.
DZS Cloud Orchestration onboards the network service descriptor, which then creates a network topology and automatically places the CNFD or VNFD on the optimal networking and compute infrastructure. It may take a few minutes before you see networking traffic. Click the dot to scroll between groups.
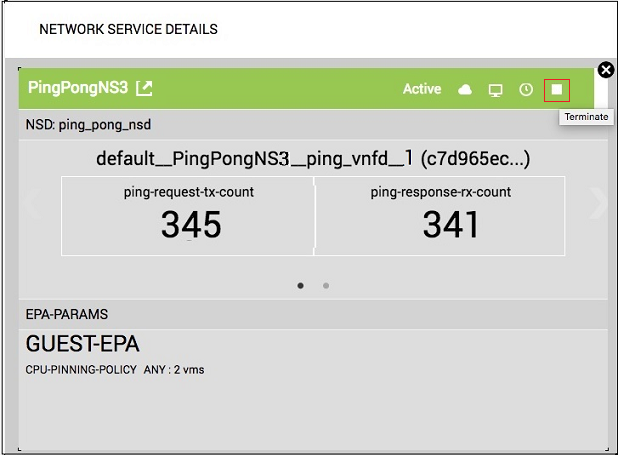
- To stop a network service instance from running, click the
Terminate icon (
 ).
).
This action begins the process of ending all services related to the instance.
A confirmation dialog opens.

- Click OK to confirm the terminate action.
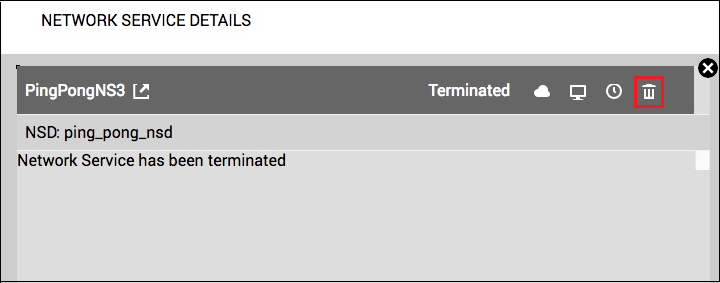
When the service has been suspended, a notification will be displayed in the Event Viewer,
and the Terminate icon will be replaced with the Delete icon
(
 ).
).
The Network Service Details screen displays the beginning of the termination process

The first step is config-terminate. The configuration is removed in this step. A green checkmark appears to the left of config-terminate when the configuration is removed successfully.
The second step is vnf-terminate. The VNFs are removed in this step. A green checkmark appears to the left of vnf-terminate when the VNFs are removed successfully.
The third step is vl-terminate. The VLs are removed in this step. A green checkmark appears to the left of vl-terminate when the VLs are removed successfully.
When the service is terminated successfully, then the below message appears, and the STATUS column displays Terminated.
All resources successfully deallocated. Network service is terminated.

- To delete a network service instance, click the Delete icon ().
.
- A confirmation dialog opens.
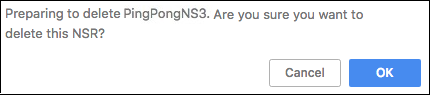
- Click OK to confirm the delete action. When the service has been deleted, a notification will be displayed in the Event Viewer.
|
© 2020 DZS. All Rights Reserved |
Published on 8/10/2021, 4:30 PM |